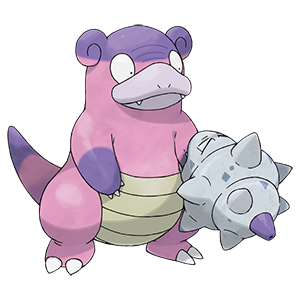
To start with, why glowbro is viable. It is a viable mon because of quick draw quick claw. This is the 44% chance to move first in your priority bracket. While it does not outspeed things like sucker punch, it is still incredibly useful as it can kill "faster" revenge killers as the opponent watches in disbelief as they see [Slowbro-Galar's Quick Draw] and get obliterated. This is further proof that glowbro is viable.
Potential Sets:
Slowbro-Galar @ Quick Claw
Ability: Quick Draw
Tera Type: Water
EVs: 252 HP / 252 SpA / 4 SpD
Modest Nature
IVs: 0 Atk
- Nasty Plot
- Surf
- Psyshock / Psychic
- Sludge Bomb
Tera Water Surf set (recommended nasty plot set)
Slowbro-Galar @ Quick Claw
Ability: Quick Draw
Tera Type: Ground
EVs: 252 HP / 252 SpA / 4 SpD
Modest Nature
IVs: 0 Atk
- Nasty Plot
- Tera Blast
- Psyshock / Psychic
- Ice Beam
The 2 aforementioned variants above are the 2 nasty plot variants. Both of them work well, especially behind screens to enable easier setting up. The surf set aims for neutral coverage on the entire tier, whereas the terablast ground set is designed to hit things like heatran, gholdengo and kingambit super-effectively all in 1 moveslot.
Slowbro-Galar @ Quick Claw
Ability: Quick Draw
Tera Type: Psychic / Fighting
EVs: 248 HP / 252 Atk / 8 SpA
Brave Nature
- Belly Drum
- Zen Headbutt
- Shell Side Arm
- Drain Punch
Slowbro-Galar @ Quick Claw
Ability: Quick Draw
Tera Type: Fighting / Ground
EVs: 248 HP / 252 Atk / 8 SpA
Brave Nature
- Belly Drum
- Zen Headbutt
- Earthquake
- Drain Punch
Tera Fighting / Ground set (recommended belly drum set)
Slowbro-Galar @ Quick Claw
Ability: Quick Draw
Tera Type: Ground
EVs: 248 HP / 252 Atk / 8 SpA
Brave Nature
- Belly Drum
- Zen Headbutt
- Earthquake
- Shell Side Arm

The first belly drum set is not very good, due to the fact it cannot OHKO gholdengo without tera psychic. However, the second set can work behind screens and use earthquake to hit gholdengo. Tera ground can be used to power up earthquake or you can use tera fighting to boost drain punch further, allowing you to get stab on your healing move. Tera fighting is recommended. The third set should only be used if your team can remove corviknight, otherwise you need to belly drum and hit 3 zen headbutts with a flinch to kill it. All 3 of these sets are effectively walled by dondozo.
Next, how to use your glowbro.
First of all, unless you are using the surf water set, you want to be using it behind screens (surf water can work on rain for OHKOs on gholdengo and kingambit at +2 tera; screens is still better). You want to aim for +2 behind screens.
Important tera water calcs (please note tera water deals the same damage as rain with surf; both will be included if needed):
Gholdengo
+2 252+ SpA Tera Water Slowbro-Galar Surf vs. 0 HP / 4 SpD Gholdengo: 289-342 (91.7 - 108.5%) -- 50% chance to OHKO
+2 252+ SpA Slowbro-Galar Surf vs. 0 HP / 4 SpD Gholdengo: 193-228 (61.2 - 72.3%) -- guaranteed 2HKO
+2 252+ SpA Tera Water Slowbro-Galar Surf vs. 0 HP / 4 SpD Gholdengo in Rain: 435-513 (138 - 162.8%) -- guaranteed OHKO
+2 252+ SpA Tera Water Slowbro-Galar Surf vs. 252 HP / 4 SpD Gholdengo in Rain: 435-513 (115 - 135.7%) -- guaranteed OHKO
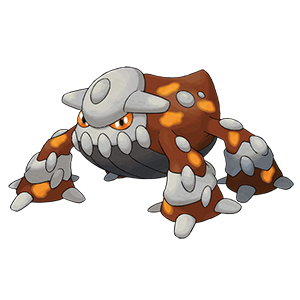
Heatran
+2 252+ SpA Tera Water Slowbro-Galar Surf vs. 252 HP / 216+ SpD Heatran: 384-452 (99.4 - 117%) -- 93.8% chance to OHKO
+2 252+ SpA Slowbro-Galar Surf vs. 252 HP / 216+ SpD Heatran: 256-302 (66.3 - 78.2%) -- guaranteed 2HKO after Leftovers recovery
+2 252+ SpA Slowbro-Galar Surf vs. 0 HP / 4 SpD Heatran: 340-402 (105.2 - 124.4%) -- guaranteed OHKO
+2 252+ SpA Tera Water Slowbro-Galar Surf vs. 0 HP / 4 SpD Heatran: 510-602 (157.8 - 186.3%) -- guaranteed OHKO
Kingambit
+2 252+ SpA Tera Water Slowbro-Galar Surf vs. 0 HP / 0 SpD Kingambit: 307-363 (90 - 106.4%) -- 37.5% chance to OHKO
+2 252+ SpA Slowbro-Galar Surf vs. 0 HP / 0 SpD Kingambit: 205-242 (60.1 - 70.9%) -- guaranteed 2HKO
+2 252+ SpA Tera Water Slowbro-Galar Surf vs. 252 HP / 0 SpD Kingambit: 307-363 (75.9 - 89.8%) -- guaranteed 2HKO after Leftovers recovery
+2 252+ SpA Slowbro-Galar Surf vs. 252 HP / 0 SpD Kingambit: 205-242 (50.7 - 59.9%) -- 85.9% chance to 2HKO after Leftovers recovery
+2 252+ SpA Tera Water Slowbro-Galar Surf vs. 252 HP / 0 SpD Kingambit in Rain: 462-544 (114.3 - 134.6%) -- guaranteed OHKO
Corviknight
+2 252+ SpA Tera Water Slowbro-Galar Surf vs. 248 HP / 8 SpD Corviknight: 306-360 (76.6 - 90.2%) -- guaranteed 2HKO after Leftovers recovery
+2 252+ SpA Slowbro-Galar Surf vs. 248 HP / 8 SpD Corviknight: 204-240 (51.1 - 60.1%) -- 89.1% chance to 2HKO after Leftovers recovery
+2 252+ SpA Slowbro-Galar Surf vs. 248 HP / 252+ SpD Corviknight: 144-170 (36 - 42.6%) -- 96% chance to 3HKO after Leftovers recovery
+2 252+ SpA Tera Water Slowbro-Galar Surf vs. 248 HP / 252+ SpD Corviknight: 216-255 (54.1 - 63.9%) -- guaranteed 2HKO after Leftovers recovery
+2 252+ SpA Tera Water Slowbro-Galar Surf vs. 248 HP / 8 SpD Corviknight in Rain: 459-540 (115 - 135.3%) -- guaranteed OHKO
+2 252+ SpA Tera Water Slowbro-Galar Surf vs. 248 HP / 252+ SpD Corviknight in Rain: 324-382 (81.2 - 95.7%) -- guaranteed 2HKO after Leftovers recovery
Clodsire
+2 252+ SpA Slowbro-Galar Psyshock vs. 248 HP / 8 Def Unaware Clodsire: 356-422 (76.8 - 91.1%) -- guaranteed 2HKO after Leftovers recovery
+2 252+ SpA Slowbro-Galar Psyshock vs. 248 HP / 8 Def Clodsire: 714-842 (154.2 - 181.8%) -- guaranteed OHKO
+2 252+ SpA Tera Water Slowbro-Galar Surf vs. 248 HP / 252+ SpD Unaware Clodsire in Rain: 290-344 (62.6 - 74.2%) -- guaranteed 2HKO after Leftovers recovery
+2 252+ SpA Tera Water Slowbro-Galar Surf vs. 248 HP / 0 SpD Unaware Clodsire in Rain: 408-480 (88.1 - 103.6%) -- 25% chance to OHKO
Slowking-Galar
+2 252+ SpA Slowbro-Galar Psyshock vs. 252 HP / 16 Def Slowking-Galar: 282-333 (71.5 - 84.5%) -- guaranteed 2HKO
252+ SpA Slowbro-Galar Psyshock vs. 252 HP / 16 Def Slowking-Galar: 142-168 (36 - 42.6%) -- guaranteed 3HKO
+2 252+ SpA Tera Water Slowbro-Galar Surf vs. 252 HP / 4 SpD Slowking-Galar in Rain: 370-436 (93.9 - 110.6%) -- 62.5% chance to OHKO
+2 252+ SpA Tera Water Slowbro-Galar Surf vs. 252 HP / 120+ SpD Assault Vest Slowking-Galar in Rain: 204-240 (51.7 - 60.9%) -- guaranteed 2HKO
𝗜𝗺𝗽𝗼𝗿𝘁𝗮𝗻𝘁 𝘁𝗲𝗿𝗮 𝗴𝗿𝗼𝘂𝗻𝗱 𝗰𝗮𝗹𝗰𝘀:
Gholdengo
252+ SpA Tera Ground Slowbro-Galar Tera Blast vs. 0 HP / 4 SpD Gholdengo: 258-306 (81.9 - 97.1%) -- guaranteed 2HKO
+2 252+ SpA Tera Ground Slowbro-Galar Tera Blast vs. 0 HP / 4 SpD Gholdengo: 516-608 (163.8 - 193%) -- guaranteed OHKO
Heatran
TL;DR it ohkoes bro
Kingambit
252+ SpA Tera Ground Slowbro-Galar Tera Blast vs. 0 HP / 0 SpD Kingambit: 272-324 (79.7 - 95%) -- guaranteed 2HKO
+2 252+ SpA Tera Ground Slowbro-Galar Tera Blast vs. 0 HP / 0 SpD Kingambit: 546-644 (160.1 - 188.8%) -- guaranteed OHKO
252+ SpA Tera Ground Slowbro-Galar Tera Blast vs. 252 HP / 0 SpD Kingambit: 272-324 (67.3 - 80.1%) -- guaranteed 2HKO after Leftovers recovery
+2 252+ SpA Tera Ground Slowbro-Galar Tera Blast vs. 252 HP / 0 SpD Kingambit: 546-644 (135.1 - 159.4%) -- guaranteed OHKO
Corviknight
+2 252+ SpA Slowbro-Galar Ice Beam vs. 248 HP / 8 SpD Corviknight: 204-240 (51.1 - 60.1%) -- 89.1% chance to 2HKO after Leftovers recovery
+2 252+ SpA Slowbro-Galar Ice Beam vs. 248 HP / 252+ SpD Corviknight: 144-170 (36 - 42.6%) -- 96% chance to 3HKO after Leftovers recovery
Slowking-Galar
+2 252+ SpA Tera Ground Slowbro-Galar Psyshock vs. 252 HP / 16 Def Slowking-Galar: 282-333 (71.5 - 84.5%) -- guaranteed 2HKO
+2 252+ SpA Tera Ground Slowbro-Galar Tera Blast vs. 252 HP / 120+ SpD Assault Vest Slowking-Galar: 240-284 (60.9 - 72%) -- guaranteed 2HKO
+2 252+ SpA Tera Ground Slowbro-Galar Tera Blast vs. 252 HP / 4 SpD Slowking-Galar: 440-518 (111.6 - 131.4%) -- guaranteed OHKO
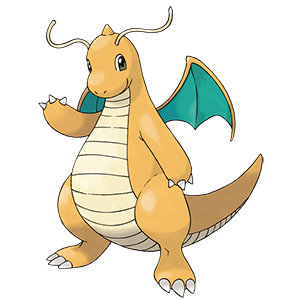
Dragonite
+2 252+ SpA Slowbro-Galar Ice Beam vs. 144 HP / 0 SpD Multiscale Dragonite: 360-424 (100.2 - 118.1%) -- guaranteed OHKO
Clodsire
+2 252+ SpA Tera Ground Slowbro-Galar Tera Blast vs. 248 HP / 252+ SpD Unaware Clodsire: 174-206 (37.5 - 44.4%) -- guaranteed 3HKO after Leftovers recovery
+2 252+ SpA Slowbro-Galar Psyshock vs. 248 HP / 8 Def Unaware Clodsire: 356-422 (76.8 - 91.1%) -- guaranteed 2HKO after Leftovers recovery
+2 252+ SpA Tera Ground Slowbro-Galar Tera Blast vs. 248 HP / 252+ SpD Clodsire: 344-408 (74.2 - 88.1%) -- guaranteed 2HKO after Leftovers recovery
𝗜𝗺𝗽𝗼𝗿𝘁𝗮𝗻𝘁 𝗯𝗲𝗹𝗹𝘆 𝗱𝗿𝘂𝗺 𝗰𝗮𝗹𝗰𝘀:
Corviknight
+6 252+ Atk Tera Fighting Slowbro-Galar Drain Punch vs. 248 HP / 252+ Def Corviknight: 312-367 (78.1 - 91.9%) -- guaranteed 2HKO after Leftovers recovery
+6 252+ Atk Slowbro-Galar Drain Punch vs. 248 HP / 252+ Def Corviknight: 208-245 (52.1 - 61.4%) -- 97.7% chance to 2HKO after Leftovers recovery
+6 252+ Atk Slowbro-Galar Earthquake vs. 248 HP / 252+ Def Tera Steel Corviknight: 554-654 (138.8 - 163.9%) -- guaranteed OHKO (tera steel simulates after roost)
Great Tusk
+6 252+ Atk Slowbro-Galar Zen Headbutt vs. 252 HP / 252+ Def Great Tusk: 570-672 (131.3 - 154.8%) -- guaranteed OHKO
+6 252+ Atk Tera Fighting Slowbro-Galar Drain Punch vs. 252 HP / 252+ Def Great Tusk: 267-315 (61.5 - 72.5%) -- guaranteed 2HKO after Leftovers recovery
+6 252+ Atk Slowbro-Galar Drain Punch vs. 252 HP / 252+ Def Great Tusk: 178-210 (41 - 48.3%) -- guaranteed 3HKO after Leftovers recovery
+6 252+ Atk Tera Ground Slowbro-Galar Earthquake vs. 252 HP / 252+ Def Great Tusk: 355-418 (81.7 - 96.3%) -- guaranteed 2HKO after Leftovers recovery
+6 252+ Atk Slowbro-Galar Earthquake vs. 252 HP / 252+ Def Great Tusk: 237-279 (54.6 - 64.2%) -- guaranteed 2HKO after Leftovers recovery
Dragonite
+6 252+ Atk Slowbro-Galar Zen Headbutt vs. 144 HP / 0 Def Multiscale Dragonite: 249-294 (69.3 - 81.8%) -- guaranteed 2HKO
+6 252+ Atk Slowbro-Galar Shell Side Arm vs. 144 HP / 0 Def Multiscale Dragonite: 280-330 (77.9 - 91.9%) -- guaranteed 2HKO
Dondozo
+6 252+ Atk Slowbro-Galar Zen Headbutt vs. 252 HP / 252+ Def Unaware Dondozo: 79-94 (15.6 - 18.6%) -- possible 6HKO
+6 252+ Atk Slowbro-Galar Shell Side Arm vs. 252 HP / 252+ Def Unaware Dondozo: 88-105 (17.4 - 20.8%) -- possible 5HKO
Skeledirge
+6 252+ Atk Tera Ground Slowbro-Galar Earthquake vs. 248 HP / 0 Def Unaware Skeledirge: 300-354 (72.9 - 86.1%) -- guaranteed 2HKO
+6 252+ Atk Slowbro-Galar Earthquake vs. 248 HP / 0 Def Unaware Skeledirge: 200-236 (48.6 - 57.4%) -- 93.4% chance to 2HKO
+6 252+ Atk Tera Ground Slowbro-Galar Earthquake vs. 248 HP / 252+ Def Unaware Skeledirge: 218-258 (53 - 62.7%) -- guaranteed 2HKO
+6 252+ Atk Slowbro-Galar Earthquake vs. 248 HP / 252+ Def Unaware Skeledirge: 146-172 (35.5 - 41.8%) -- guaranteed 3HKO
Landorus-Therian
+5 252+ Atk Slowbro-Galar Zen Headbutt vs. 252 HP / 248+ Def Landorus-Therian: 322-381 (84.2 - 99.7%) -- guaranteed 2HKO
+6 252+ Atk Slowbro-Galar Zen Headbutt vs. 252 HP / 248+ Def Landorus-Therian: 370-436 (96.8 - 114.1%) -- 81.3% chance to OHKO
Next, we move onto quick draw odds (rounded to 2 D.P).
1 Proc: 44%
2 Consecutive: 19.36%
3 Consecutive: 8.52%
4 Consecutive: 3.75%
5 Consecutive: 1.65%
Full Sweep: 0.72%
𝗛𝗼𝘄 𝘁𝗼 𝗸𝗶𝗹𝗹 𝗺𝗼𝗻𝘀 𝘄𝗶𝘁𝗵 𝘆𝗼𝘂𝗿 𝘀𝘂𝗿𝗳 𝗴𝗹𝗼𝘄𝗯𝗿𝗼:
Kingambit
If behind screens you can tera water and nasty plot, followed by surf on the next turn. Depending on the kingambit set, this can do anywhere from between 75% to 106%, while always grabbing the OHKO under rain. It should be noted that if the gambit is below 50% you do not need to tera, while also noting that at +4 or under rain tera water surf will always KO a max hp kingambit, while also taking little damage from sucker punch when terad and behind screens. This means that glowbro is capable of beating kingambit, and can do so if the kingambit is chipped, rain is set or you are able to nasty plot on the switch in. You should never hard switch glowbro into kingambit unless you have to.
Gholdengo
For gholdengo the same logic applies as kingambit. However, do not use your tera unless you are at full hp behind screens and you are confident that you can beat it. To beat it, you either need to hit it once with a high roll +2 tera surf, hit it once with a +4 tera surf or hit it once in rain with a +2 tera surf. It deals 60-70% without tera at +2, so you do not need tera to 2HKO it, you simply use it to remove shadow ball weakness to reduce risk, while also allowing for a potential surprise OHKO on a gholdengo coming in that thought it was safe.
Heatran
Heatran is a simple pokemon to beat. However, it has some nuances. It cannot switch in due to the fact that +2 surf does minimum 65% to spdef heatran while only at +2 unterad, while doing minimum 99.4% while tera'd, or a guaranteed OHKO with stealth rocks. Offensive heatrans thinking they are safe to switch in get OHKOED by unterad +2 surf, meaning that heatran is effectively unable to reliably switch into glowbro. However, due to taunt, earth power and the chip damage from magma storm, heatran is hard to set up on, even behind screens, If your qdqc does not activate you are unable to set up and at risk of getting trapped. However if you are able to get a nasty plot off the same logic applies.
Blissey
Blissey is a difficult pokemon to beat, and depending on the set not entirely guaranteed. If the blissey is not tera dark, they lose to psyshock instantly. If the blissey is tera dark and not calm mind, +6 sludge bomb 2HKOES it and easily beats it. Calm mind tera dark blissey is more difficult to beat, as you need to get to +6 and then poison them with sludge bomb. For example, you can nasty plot on the switch, and if you are able to get a nasty plot in again without them calm minding, you can go for a third nasty plot and end up with you on +6 spatk and the blissey at +1 spdef, obviously, a crit at any point effectively wins but a sludge bomb poison can also win, as they are not able to switch out and remove the poison.
Toxapex
Toxapex is almost complete fodder for glowbro. It is unable to be toxic'd, takes very little from toxapex's stabs and is able to set up and hit very hard into it with psyshock, dealing a minimum of 88% and a maximum of 103%, with an OHKO chance of 18.8%. Note that +2 psychic kills physdef toxapex and +2 psyshock kills spdef pex. This means that glowbro is able to do almost 90% on the haze, nasty plot again as they recover and then kill toxapex, while still remaining at almost full HP, having used almost no PP in the process.
Zapdos
Zapdos is another pokemon like heatran, where if you are already set up it is beatable but it is hard to set up on, especially outside of screens, For example, a +2 sludge bomb does minimum 75%, an ice beam is a guaranteed OHKO, a tera water surf also does minimum 75% and in rain it OHKOS. However, outside of screens even defensive zap 2HKOES you with hurricane, so it is hard to set up on outside of screens. Also, if you see a zapdos and you are not able to get +4, try to avoid using tera water as it makes you vulnerable to thunderbolt, especially if qdqc does not proc.
Great Tusk
Great Tusk is a simple pokemon to beat. Due to great tusk's low special defense, +2 psychics, ice beams, and surfs all easily OHKO it, while psyshock does minimum 65% due to it calculating on great tusks stronger side. If you are setting up on great tusk, try not to let your quick claw get knocked off as it reduces the odds of a quick draw proc, from 44% to 30% which can make it much harder to sweep. However, if you are already set up great tusk drops to any move but sludge bomb and psyshock.
Landorus-Therian
Lando-t is another pokemon that is simple to beat but slightly harder to set up on. It has a better spdef stat but does still drop to a +2 unterad surf if not invested, or an unboosted ice beam due to the quadruple ice weakness. Behind screens, earthquake from a physically defensive lando does a maximum of 46% so you are able to nasty plot and attack, but this is further reduced by tera water, which limits earthquake damage to 23%, meaning that you are easily able to set up on it and create a sweep opportunity. Offensive landos are harder to set up on but are also killed much more easily. For example, earthquake's 2hko chance behind screens increases to 75% from an offensive set, but it also dies to an unboosted tera water surf, taking a minimum of 112%.
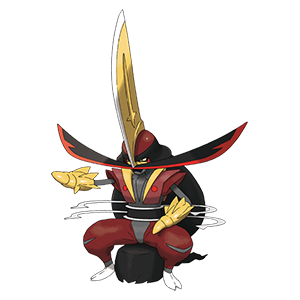
Samurott-Hisui
Samurott is another mon that is easy to beat if you are already set up. +2 sludge bomb cleanly 2HKOES non-AV variants while dealing large damage to av variants. You take a maximum of 43% from ceaseless edge behind reflect, and a maximum of 22% when terad behind reflect. This means that samurott is easy to beat, but not difficult to set up on either.
Corviknight
Corviknight is not 2HKOED by +2 tera surf, but it can also do almost 0 damage back to glowbro. Brave bird does a maximum of 18% behind reflect, meaning that you are easily able to get to +4 to OHKO physically defensive corviknights or +6 to OHKO specially defensive corviknights. Also, if you are able to get to +6, every qdqc proc will be a kill meaning that glowbro is much more threatening.
Dondozo
Spdef dondozo is almost unbeatable for glowbro, unless it is not running rest. This is due to the combination of rest, unaware and high hp. Physdef dondozo takes 36% minimum from sludge bomb, but it can rest of the damage and the poisons, making it hard to beat. Spdef dondozo takes 25% minimum, making it almost unbreakable, unless it tera's to fairy or ground (surf). Furthermore, if the dondozo is not running rest, you can simply fish for poisons until you get one and can break it.